Friday, June 3, 2011
The end of all!!!!
This was a fun project and class. It doesn't much like a realistic apple but it looks like a apple. This class was fun to be in with friends. It was a little hard.
Tuesday, May 31, 2011
Apple!!
Started working on the water drop lets today. One more class left then the end of the year. Can't wait to finish this project. It was fun at first but now it is just to long.
Wednesday, May 25, 2011
Apple!!
Today I finished up blending up the apple. I also started on the shadow. It looks pretty good but could be better. Next class I will start on the water drop lets.
Monday, May 23, 2011
Apple!!!
So today I finished up putting color on my apple. I started blending the colors and making it look more like an apple. I am using a soft brush to blend the colors and it is really working. My apple is really coming along.
Thursday, May 19, 2011
Apple
Mad outline of the apple! Picked out primary and secondary colors. Then Started blending. this is fun.
Tuesday, May 17, 2011
Done with project and new one!
So I am finished with the ball and the shadow. Because i was absent i started the new project today with no idea what to do. Painting a apple with multiple layers. This will go to the end of the year. It seems fun but hard.
Monday, May 9, 2011
Shadow of ball.
Just worked on shadow ball. Finished blending colors inside ball. Started the shadow on the outside today. This is frustrating.
Thursday, May 5, 2011
Haunted House!
This is my finished house Today i finished it and worked on my 3d ball. It is hard and i don't like my house. Blending is hard but it will help.
Tuesday, May 3, 2011
New project!!
We started a new project. We are trying to make a 3d ball with a shadow. we will finish our house next time but this new project is different because it is painting. We started it today and it was hard. Everything is hard in this class.
4-2511/4-28-11 Forgot to blog
I forgot to blog on Tuesday and Thursday. But all i did was work on my house. On 4-25 i was working on the crumbling building and making it look like it was real. It kind of does. On 4-28 i started the bushes and i am working on making it look darker and real.
Monday, April 25, 2011
Another day of the house!!
i am starting to work on the grass. Also i have to make part of the house collapsed. That sucks. Just started on that and it is hard. Well were almost done so better get done quick.
Thursday, April 21, 2011
Haunted House still!
Were still working on the house and mine is getting better. I added a ghost and blood. I also boarded up and broke more windows. I made my house darker to give it the affect that it is scarier but I don't think it is. I don't think I am doing very good on this project but we will see.
Tuesday, April 19, 2011
house
just worked on house was hard. Put graffiti on my house and boarded up windows. this project sucks. Put Cassidy and Sammy make it fun.
Friday, April 15, 2011
Haunted House 3!
We are still working on are houses! Today I tried to work on the outside of the house the walls. I also worked on some more windows. This project is difficult and annoying. Maybe it's fun for someone.
Wednesday, April 13, 2011
Haunted House!
We are working on the house today. We are putting broken windows and boarded up windows. We are also putting old paint on the building. We are trying to make this as scary as possible.
Monday, April 11, 2011
Haunted House!
we started a new project! we have to take a picture of a house and cut it out than take a back round and than make it scary. It is going to be fun. so far it is not starting out well.!!!
Thursday, April 7, 2011
Nothing!!
We didn't do anything today accept go to asset day and watch a presentation. We also got a new assignment for next week! Haunted Mansion!
Wednesday, April 6, 2011
Final 5 Abstract!!
This picture is a good example of abstract. If you Google abstract most pictures have lines like this. The y overlap and go in all different directions. They also have some random shapes in there like the flowers.
This is abstract because abstract has repeated patterns with smaller patterns in them.
This image is abstract because abstract pictures are sometimes multiply colors and make you look in different directions like this one.
This is a abstract image because it is a repetitive that makes you look through the entire picture.
This is a great example of an abstract image because it leads your eye through the image and uses multiple colors. It also overlaps.
Final 20 Abstract Images!!
This image is interesting because you start looking at one arrow going one way than you look at another going a different way. It makes your eyes move through out the picture.
This picture is interesting because it shows a small amount of thick lines moving through the center of the picture.It also leads your eyes through the picture.
This has a small amount of lines that are tiny but thick.With only two colors it is interesting.
This picture is like a web. It starts at the bottom of the page and leads you out to the edge of the paper so you see it all. It captures you.
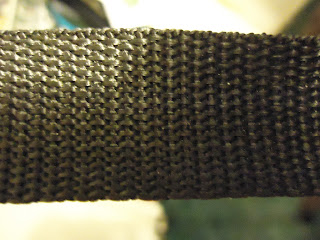
This is interesting because the bottle is the only thing in focus and has much detail. You can see the water in it and the fine lines of the bottle too. It draws you in with its detail.
The same repeated pattern with a shadow. Reppition is interesting in its own way.
It may be a star but the patterns inside are unique.There different, complex, and simple. the differences brings in people to see what the object really is.
The repetition of the beads and the nice pattern make you think it is something interesting. It has a lot of detail and has little abstract designs in the patterns.
This is interesting because it is like splashes and flowers. The lines overlap giving it more detail and drawing people in.
Glitter!!!! The multiple colors are cool and there are no defined lines of wher the colors end that's cool. The colors sort of mash together.
The pattern of the blue and white stripes is very common but still likable. It is interesting because it captures eyes and the lines are not evenly spaced.
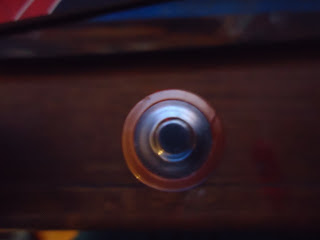
The multiple circles make you wonder what the object is.
The back is obviously brick. But with detail. You can see the tiny itty bitty specs. What is the blue thing?
Two different designs. This is tricky to guess what this is because it has flame red on one side and green grass on the other.
The first thing you see is the dark red than the light red than the thing floating. It is interesting that you can see the layering in the object. It makes it cool.
Multiple lines pointing different ways. You can see about three colors in there or more. The unusual lines lead the person through the picture.
Threads that are multiple colors that are shooting in different directions.
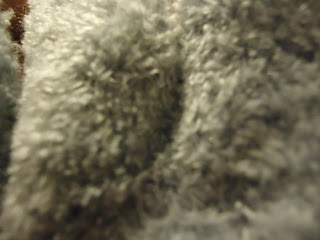
Little tiny strings in all different directions, one color but still cool.
It is interesting and captivating. There are multiple small threads weaved together to make one big thread that is weaved together with other threads.All different colors. Making an interesting picture. The thick lines going one way and the other lines going the other lead you through the picture.
This picture is interesting because it shows a small amount of thick lines moving through the center of the picture.It also leads your eyes through the picture.
This has a small amount of lines that are tiny but thick.With only two colors it is interesting.
This picture is like a web. It starts at the bottom of the page and leads you out to the edge of the paper so you see it all. It captures you.
This is interesting because the bottle is the only thing in focus and has much detail. You can see the water in it and the fine lines of the bottle too. It draws you in with its detail.
This is interesting because it leads you down.You can tell it is a shot taken from the top and the picture leads you downwards with the shapes.
The different shapes are very interesting. They lead you through the picture even if thy are oddly shaped.The same repeated pattern with a shadow. Reppition is interesting in its own way.
It may be a star but the patterns inside are unique.There different, complex, and simple. the differences brings in people to see what the object really is.
The repetition of the beads and the nice pattern make you think it is something interesting. It has a lot of detail and has little abstract designs in the patterns.
This is interesting because it is like splashes and flowers. The lines overlap giving it more detail and drawing people in.
Glitter!!!! The multiple colors are cool and there are no defined lines of wher the colors end that's cool. The colors sort of mash together.
The pattern of the blue and white stripes is very common but still likable. It is interesting because it captures eyes and the lines are not evenly spaced.
The multiple circles make you wonder what the object is.
The back is obviously brick. But with detail. You can see the tiny itty bitty specs. What is the blue thing?
Two different designs. This is tricky to guess what this is because it has flame red on one side and green grass on the other.
The first thing you see is the dark red than the light red than the thing floating. It is interesting that you can see the layering in the object. It makes it cool.
Multiple lines pointing different ways. You can see about three colors in there or more. The unusual lines lead the person through the picture.
Threads that are multiple colors that are shooting in different directions.
Little tiny strings in all different directions, one color but still cool.
It is interesting and captivating. There are multiple small threads weaved together to make one big thread that is weaved together with other threads.All different colors. Making an interesting picture. The thick lines going one way and the other lines going the other lead you through the picture.
Tuesday, April 5, 2011
Day 4-5-11
Today was just a work day for are project or to catch up on class work. It was long and boring.
Wednesday, March 23, 2011
Fruit face!!!
My fruit is complete!! It looks funny but that's OK!! I was absent last class but I still finished it with the help of Sammy and Cassidy.
Thursday, March 17, 2011
Fruit face!!!
We started a new project! We have to cut out a fruit and a face and put the face on a fruit. It was a little easy at first but than putting the face on the fruit is tricky. the project will take a little while put it is fun and frustrating.like always.
Tuesday, March 15, 2011
More pics!!
These were easy and fun and I did these in one day. they look pretty and will help me in the future of this class.
Friday, March 11, 2011
Mini pictures!
We made small abstract pictures that did not take that long. These were just to gain more experience on photo shop. I did the green one last week and the other two today. They were tutorials and kind of easy to follow.
Wednesday, March 2, 2011
Done with scooby!!!!
My spider Scooby is finally finished. But it sucks. Mr. Cornell said it looks like it got ran over by a car. Sammy says it looks like Scooby is sneezing out the webbing.I can't imagine what Cassidy will say.Their just messing with me.My difficulties in this process were definitely the webbing. Maybe this will help in the future or not. But this was extremely hard.
Monday, February 28, 2011
Scooby!
were still doing the same thing and it is still really hard. Mine is going to turn out really bad.the webbing is hard but it will help in the future.
Thursday, February 24, 2011
Scooby continued!!
We are still working on spider Scooby.Were working on doing the webbing on his face. We have been using multiple tools that we have learned about in class. This is very difficult and time consuming.It will take a few more days.
Friday, February 18, 2011
Scooby continued!!
Were still working on Scooby. But now were on the face. We just have to work on putting the mask on and making it look real. We are using the liquefy tools and the loop tool. This is the most challenging part of this project.
Wednesday, February 16, 2011
New Project! Spider scooby!
We had to take a picture of Scooby and cut out his head. Than put it over a picture of spider man and expand to fit his head. Than we have to take the mask and put it over Scooby's face so it looks like his face with the mask on. Were doing the mask tomorrow. This project was easier for me than other ones for some reason.
Monday, February 14, 2011
Zhino! again
I fixed my zhino. I cleaned up the legs and changed the colors of the horns and hoofs. It looks a little better but I still don't like it much.
Thursday, February 10, 2011
Zhino! (zebra and rhino)
We got a new project making a rhino and zebra. We first removed the back round of the zebra than pasted the rhino picture behind it. After we did, we moved the picture to fit in the rhino . It was hard and I did really bad.
Tuesday, February 8, 2011
Liberty! post 9
We got a new assignment today.We had to remove the blue back round and keep the nice details on the statue. We used the new tool called the lasso.
Car! poast 8
This was removing certain objects. But I messed up on the street when I was taking out the car. But he told me to move on anyways because I was spending days on this and it was getting on my nerves.
Brothers!Post 7
The first picture is the original the second is the one I did after I changed it.I did my best to made it look kind of like him but it is his brother.
Friday, February 4, 2011
Monday, January 31, 2011
Day 5 1-31-11
Today we finished up are object removal picture. It was VERY difficult. We used the paint brush tool the,healing brush tool and the eye dropper. This was difficult but it will help us in the future for this class.
Sunday, January 30, 2011
New project!! Removing objects from picture!! on 1-27-11
Today we were given a new assignment. We were given a picture and were supposed to take out specific objects. We used photo shop again but this time we used a new tool.It was supposed to use the color next to the object than cover it up. So it looks like the object was never there. It really works.
Thursday, January 27, 2011
1-25-11(actually 1-27-11)
Today we finished our pictures of the twin brother of the guy. We put the original next to are picture and saw the results. they were ok!!
Sunday, January 23, 2011
First project in computer graphics!
We got a picture of a person and were support to to turn the picture in to the guy's twin brother. So when you looked at the original it is kind of the same but not really. We had to liquidity the picture on photo shop than move the picture around to change the shape of the face. If you put the original next to the changed twin you should find similarities and differences because even though there twins there not the same.I referred back to the original multiple times to make sure the picture wasn't the same. Overall it was a new experience for me in this class.
Friday, January 21, 2011
Subscribe to:
Comments (Atom)


